Setup IIS Proxy: Difference between revisions
From Data Islands
WikiSysopdi (talk | contribs) (Created page with "Within IIS in our example we create an Application. Within that application click on "URL rewrite" On that screen Click "Add Rule" in the top right. This opens a dialog. Within the dialog click "Reverse Proxy" This in turn opens a dialog to add in the Reverse Proxy rule. Add in your url from the console EG http://localhost:54571 You can see the inbound Rule then also from within the URL rewrite section") |
WikiSysopdi (talk | contribs) No edit summary |
||
| Line 1: | Line 1: | ||
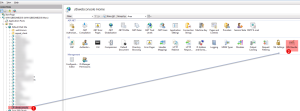
Within IIS in our example we create an Application. | Within IIS in our example we create an Application. | ||
[[File:IIS Url Rewrite.png|alt=IIS Url Rewrite|thumb|IIS Url Rewrite]] | |||
| Line 6: | Line 7: | ||
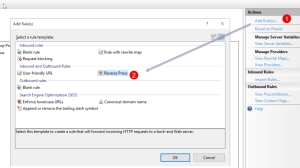
On that screen Click "Add Rule" in the top right. | On that screen Click "Add Rule" in the top right. | ||
[[File:IIS Add Rule.png|alt=IIS Add Rule|thumb|IIS Add Rule]] | |||
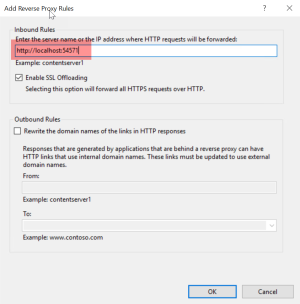
[[File:IIS Add Reverse Proxy Rule.png|alt=IIS Add Reverse Proxy Rule|thumb|IIS Add Reverse Proxy Rule]] | |||
This opens a dialog. | This opens a dialog. | ||
| Line 13: | Line 15: | ||
This in turn opens a dialog to add in the Reverse Proxy rule. | This in turn opens a dialog to add in the Reverse Proxy rule. | ||
| Line 23: | Line 26: | ||
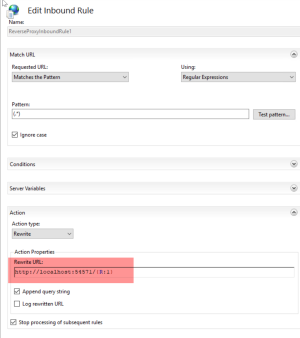
You can see the inbound Rule then also from within the URL rewrite section | You can see the inbound Rule then also from within the URL rewrite section | ||
[[File:Edit Inbound Rule.png|alt=Edit Inbound Rule|thumb|Edit Inbound Rule]] | |||
Revision as of 10:15, 15 December 2023
Within IIS in our example we create an Application.

Within that application click on "URL rewrite"
On that screen Click "Add Rule" in the top right.


This opens a dialog.
Within the dialog click "Reverse Proxy"
This in turn opens a dialog to add in the Reverse Proxy rule.
Add in your url from the console
EG
You can see the inbound Rule then also from within the URL rewrite section
